Getting Started with Home Assistant
Getting Started with Home Assistant
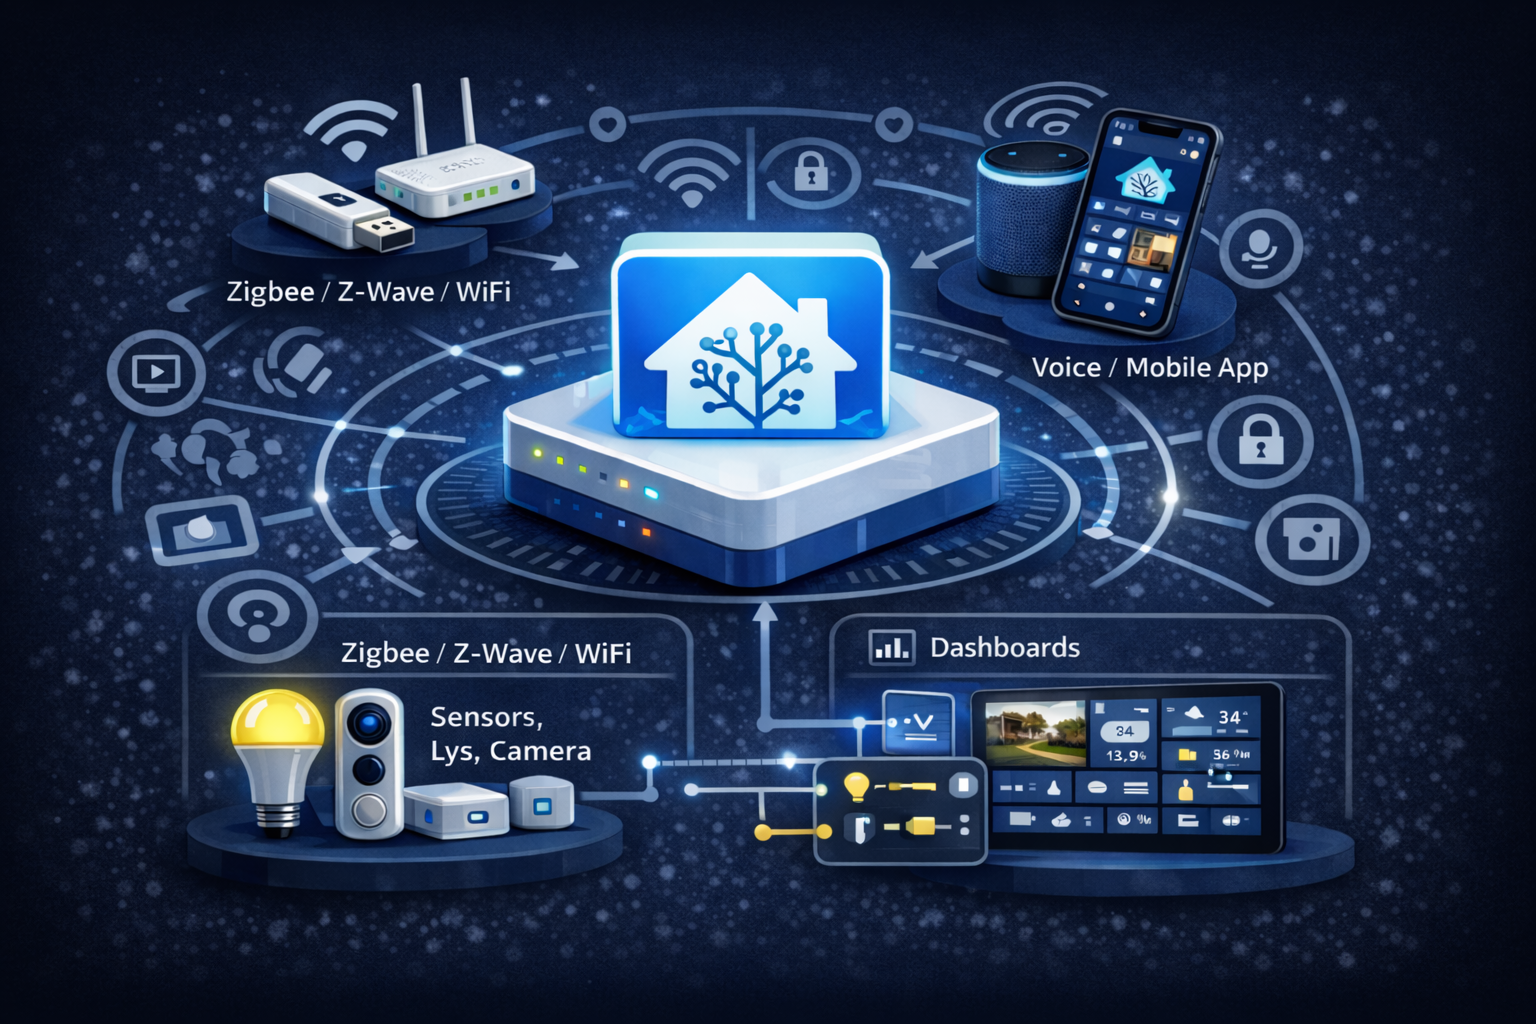
Section titled “Getting Started with Home Assistant”Home Assistant is an open-source platform that lets you control and automate your entire smart home from one place. This guide gets you started.
What is Home Assistant?
Section titled “What is Home Assistant?”Home Assistant is:
- Free and open source - No monthly fees or cloud dependency
- Local control - Your data stays at home
- Highly compatible - Works with 2000+ integrations
- Powerful automations - From simple to advanced
What do you need?
Section titled “What do you need?”Hardware (choose one)
Section titled “Hardware (choose one)”| Option | Pros | Cons | Price |
|---|---|---|---|
| Raspberry Pi 4/5 | Easy to start | Limited power | ~$80 |
| Mini PC | More power, reliable | Higher price | ~$150-300 |
| Proxmox/VM | Best for home servers | Requires knowledge | Varies |
| Docker | Use existing server | More complex | Free |
Recommended starter kit
Section titled “Recommended starter kit”- Raspberry Pi 4 (4GB) or Pi 5
- 32GB+ SD card (or SSD via USB)
- Power supply (official)
- Ethernet cable (recommended)
- Zigbee coordinator (e.g., Sonoff ZBDongle-P)
Installation Methods
Section titled “Installation Methods”1. Home Assistant OS (Recommended)
Section titled “1. Home Assistant OS (Recommended)”The easiest way - a complete operating system with everything included.
Best for: Beginners, dedicated hardware
Raspberry Pi Installation Guide →
2. Home Assistant Container (Docker)
Section titled “2. Home Assistant Container (Docker)”Run Home Assistant in a Docker container.
Best for: Existing servers, NAS devices
3. Home Assistant Core
Section titled “3. Home Assistant Core”Manual installation in Python virtual environment.
Best for: Advanced users, custom setups
First Steps After Installation
Section titled “First Steps After Installation”1. Create your account
Section titled “1. Create your account”When you first access Home Assistant at http://homeassistant.local:8123:
- Create your user account
- Set your home location (for sun-based automations)
- Choose which devices to auto-discover
2. Explore the interface
Section titled “2. Explore the interface”- Overview - Your main dashboard
- Settings - Configuration and integrations
- Automations - Create rules and triggers
- Developer Tools - Debug and test
3. Add your first device
Section titled “3. Add your first device”The easiest devices to start with:
- Smart plugs (measure power consumption)
- Temperature sensors
- Motion sensors
- Smart bulbs
Next Steps
Section titled “Next Steps”Once Home Assistant is running:
- Set up Zigbee2MQTT for Zigbee devices
- Create your first automation
- Build an ESP32 sensor
Common Issues
Section titled “Common Issues”Can’t access Home Assistant?
Section titled “Can’t access Home Assistant?”- Check if the device is powered on
- Try
http://homeassistant.local:8123orhttp://<IP>:8123 - Wait 5-10 minutes after first boot
Slow performance?
Section titled “Slow performance?”- Use SSD instead of SD card
- Ensure adequate power supply
- Consider upgrading to more powerful hardware